This article has not yet been rated.
There are two main view options in Teams: List and Grid. Each option affects how your Team appears especially relative to the arrangement of Tabs.
To change your view, click the 3-dots on the right of the top bar, and in the drop-down, select Settings.
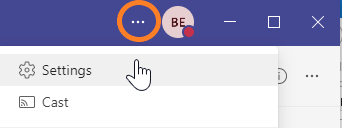
In Settings, under Layout, see the thumbnail for each type of view. Your current view is underlined, and you can click the other to select it and then close the settings window.
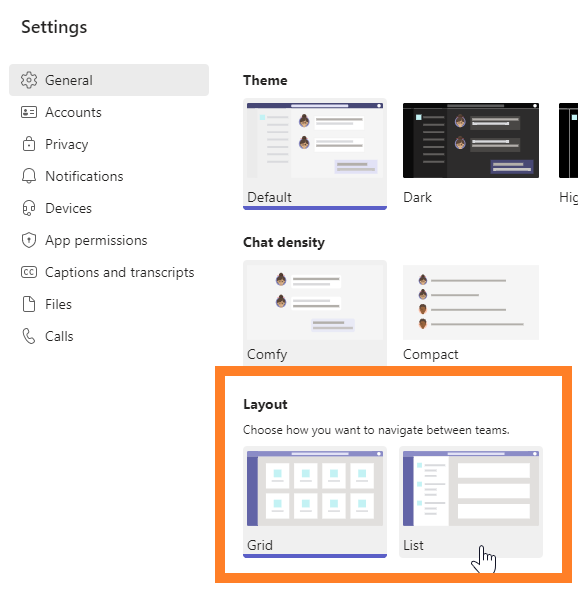
Grid View
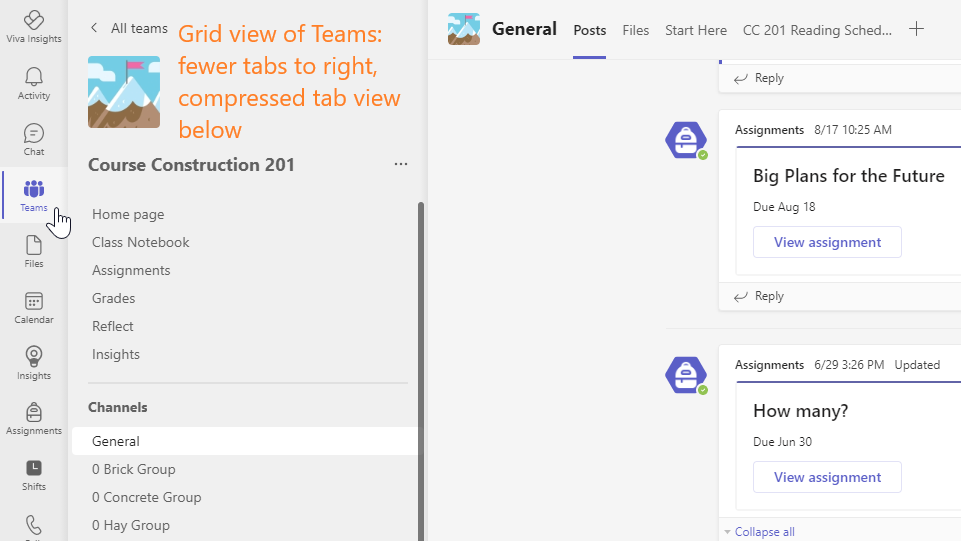
Grid view places essential tabs on the left allowing for a cleaner view and quicker access. With fewer tabs at the top, your added tabs are closer to the front. Grid View also allows better focus on your current task. To get to other teams, click "All teams" by the back arrow or Teams in the home row to return to the "grid" of all your teams.
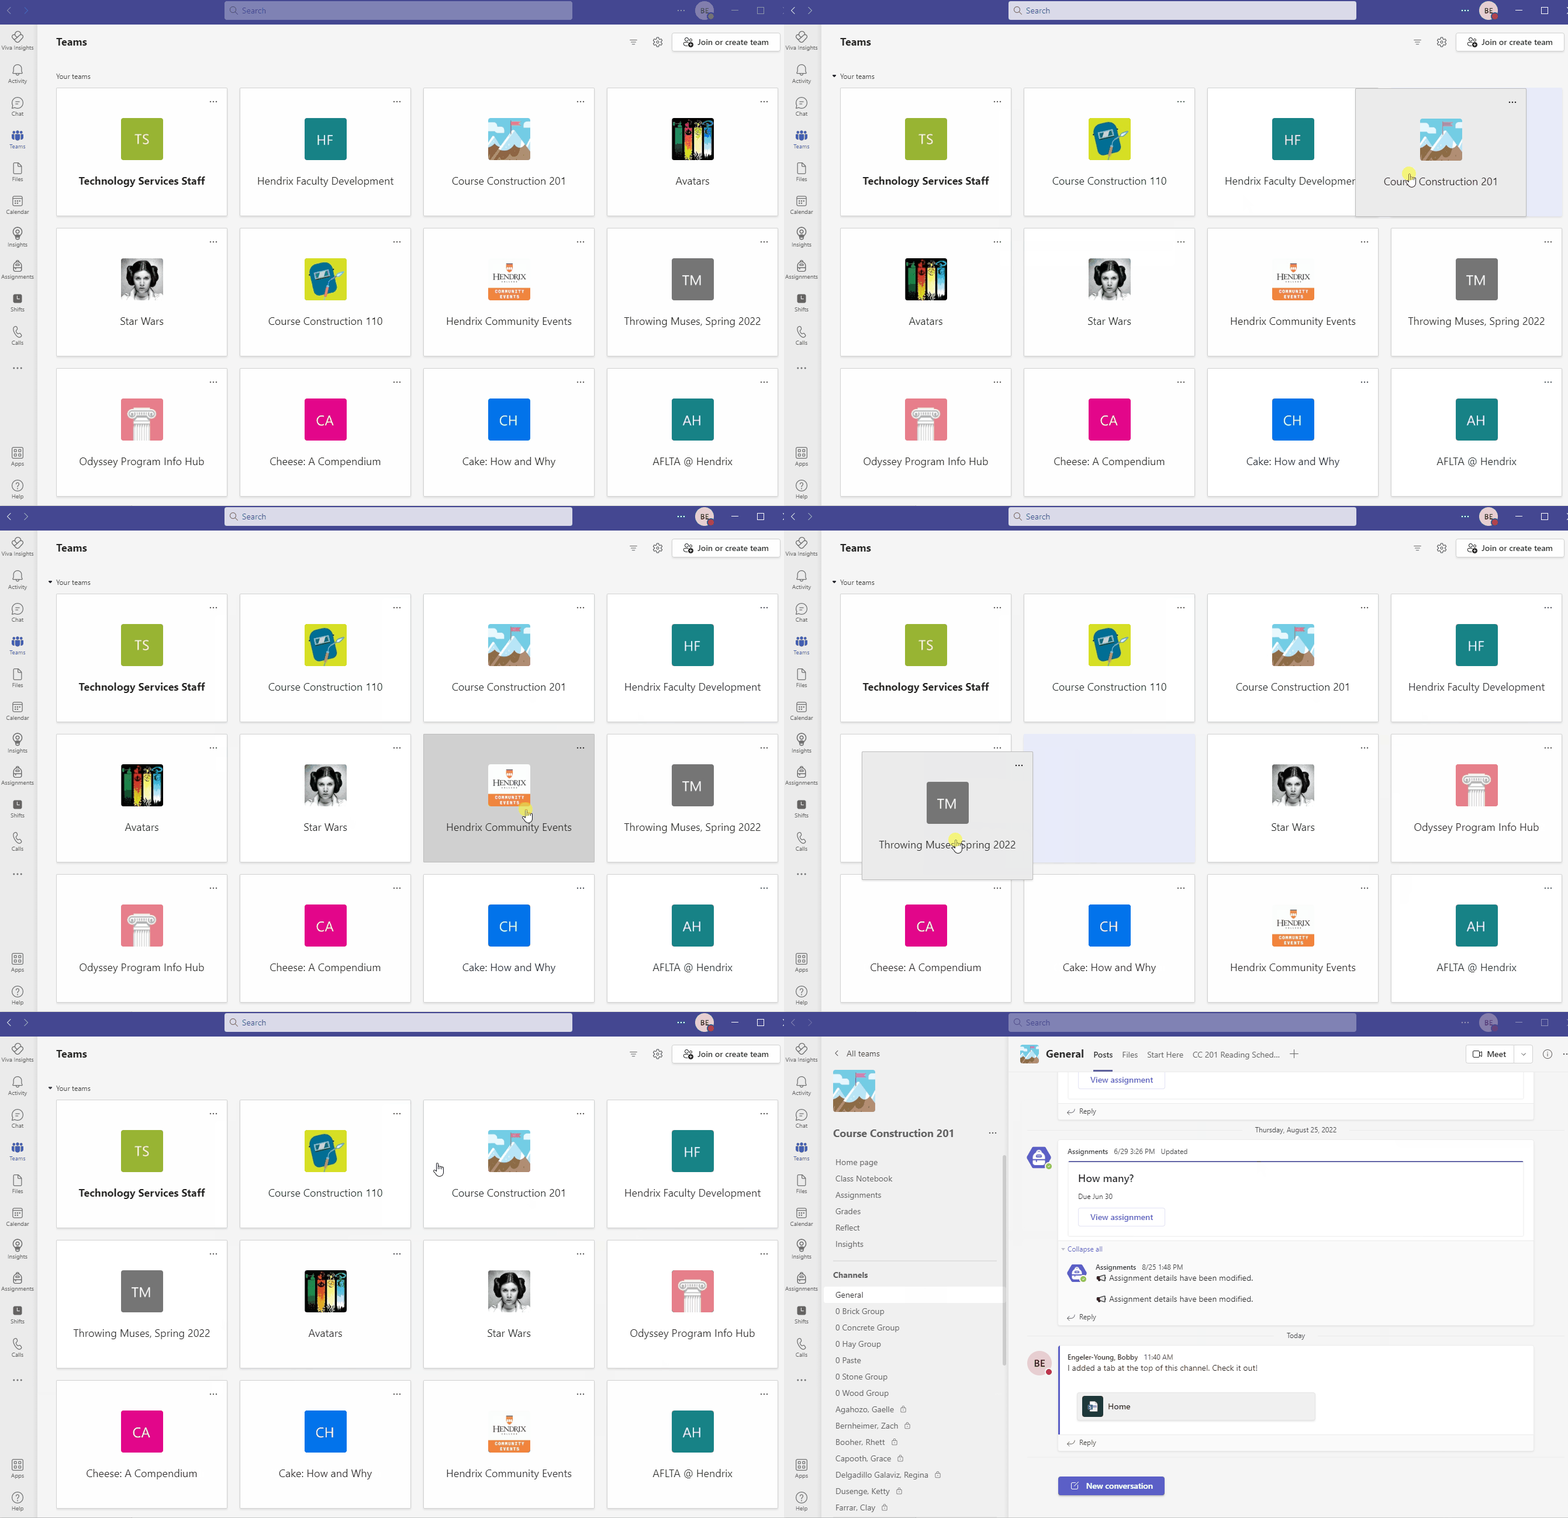
Grid view of "Your teams" can be organized by click-n-drag your Teams into your preferred arrangement. Click on the Team to go to it.
List View
List View of Teams has all your Teams in a scrollable list on the left but has no compressed view of the other tabs. The list of tabs along the top can be very long and has very few options for managing the arrangement. In the left column, all your teams are sorted by Pinned and Your teams: you can Pin individual Channels to keep them at the top, while "Your teams" is sorted by frequency of use.
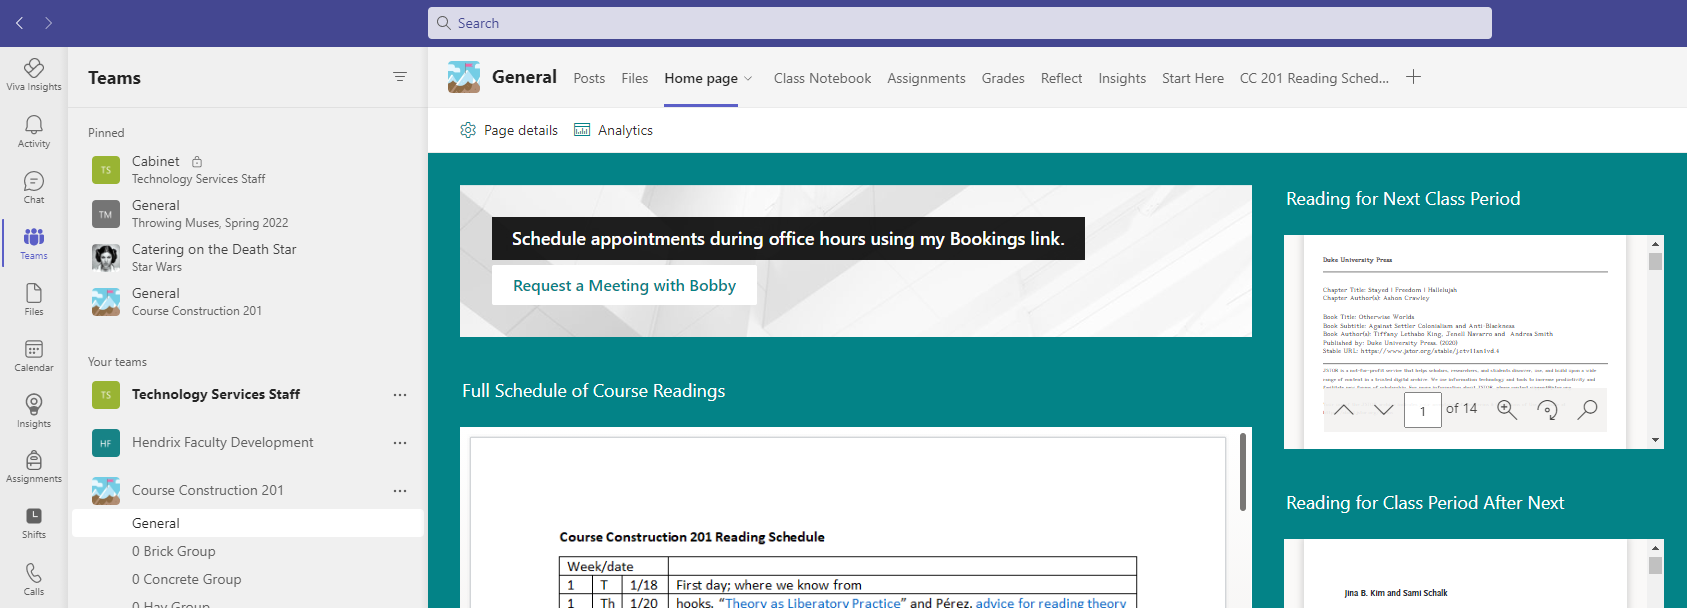
For both List and Grid views, Posts and Files are locked in the #1-2 spots on the tab bar.
For courses, if you want to direct your students' attention to added tabs and ignore locked-in-place-but-unused tabs, consider recommending using Grid view.