This article has not yet been rated.
Instructors and Team owners have the ability to add or remove members from their team, including:
Adding Students to your Class:
Go to your course in Teams.
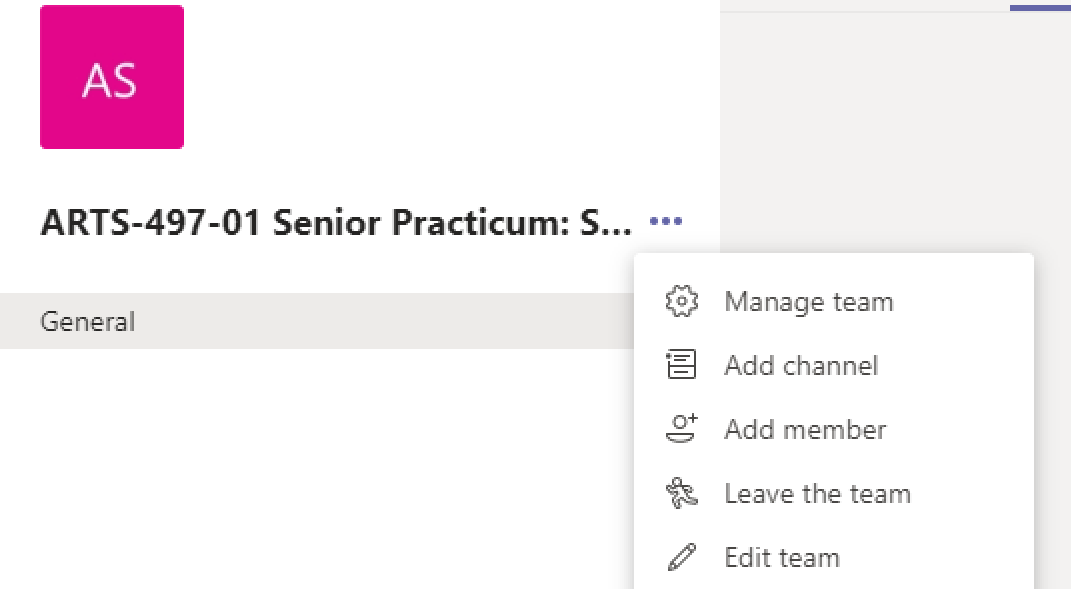
Click the ellipsis next to your course or team name and select + Add member.

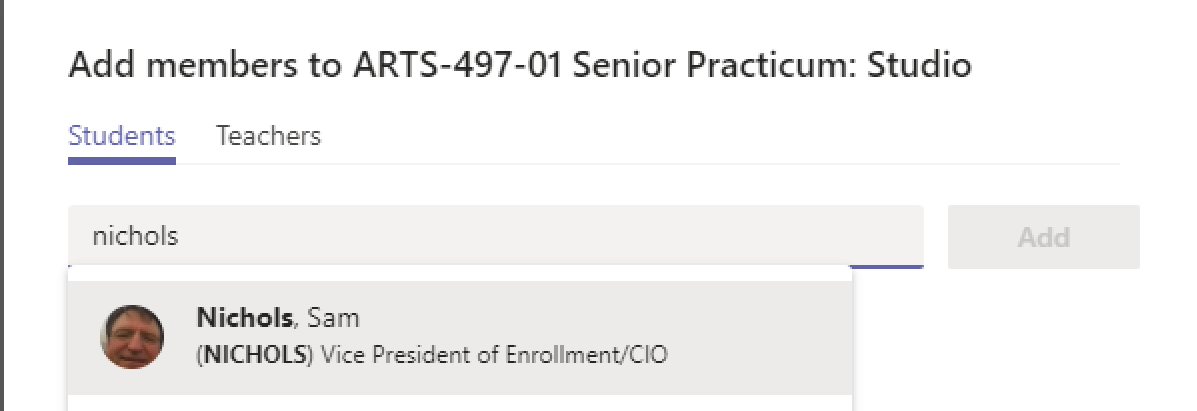
3. On the Add Members screen, Make sure Students is selected and start typing the email address of the person you want to add. Generally, the first few letters will bring up a list of names to select, so you won't have to type full names necessarily. (This is important when typing Engeler-Young, less so when typing Hau.) Also, you can add multiple names at once if you keep adding names like you would when adding multiple people to an e-mail. If you want to add a colleague or a TA, you can add them under the Teachers tab. When you've entered all the members you want, click Add.

4. Once you have everyone you wish to add, click the Add button.
Removing and promoting Team members:
1. Go to your course in Teams.
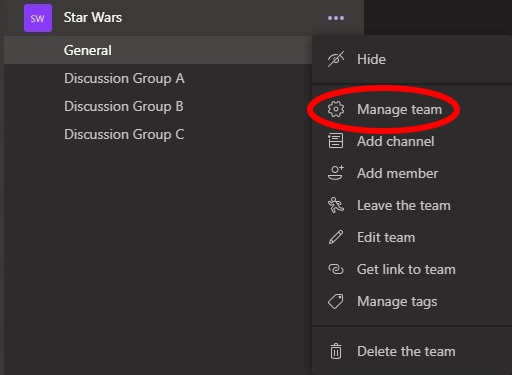
2. Click the ellipsis next to your course or team name and select Manage team.

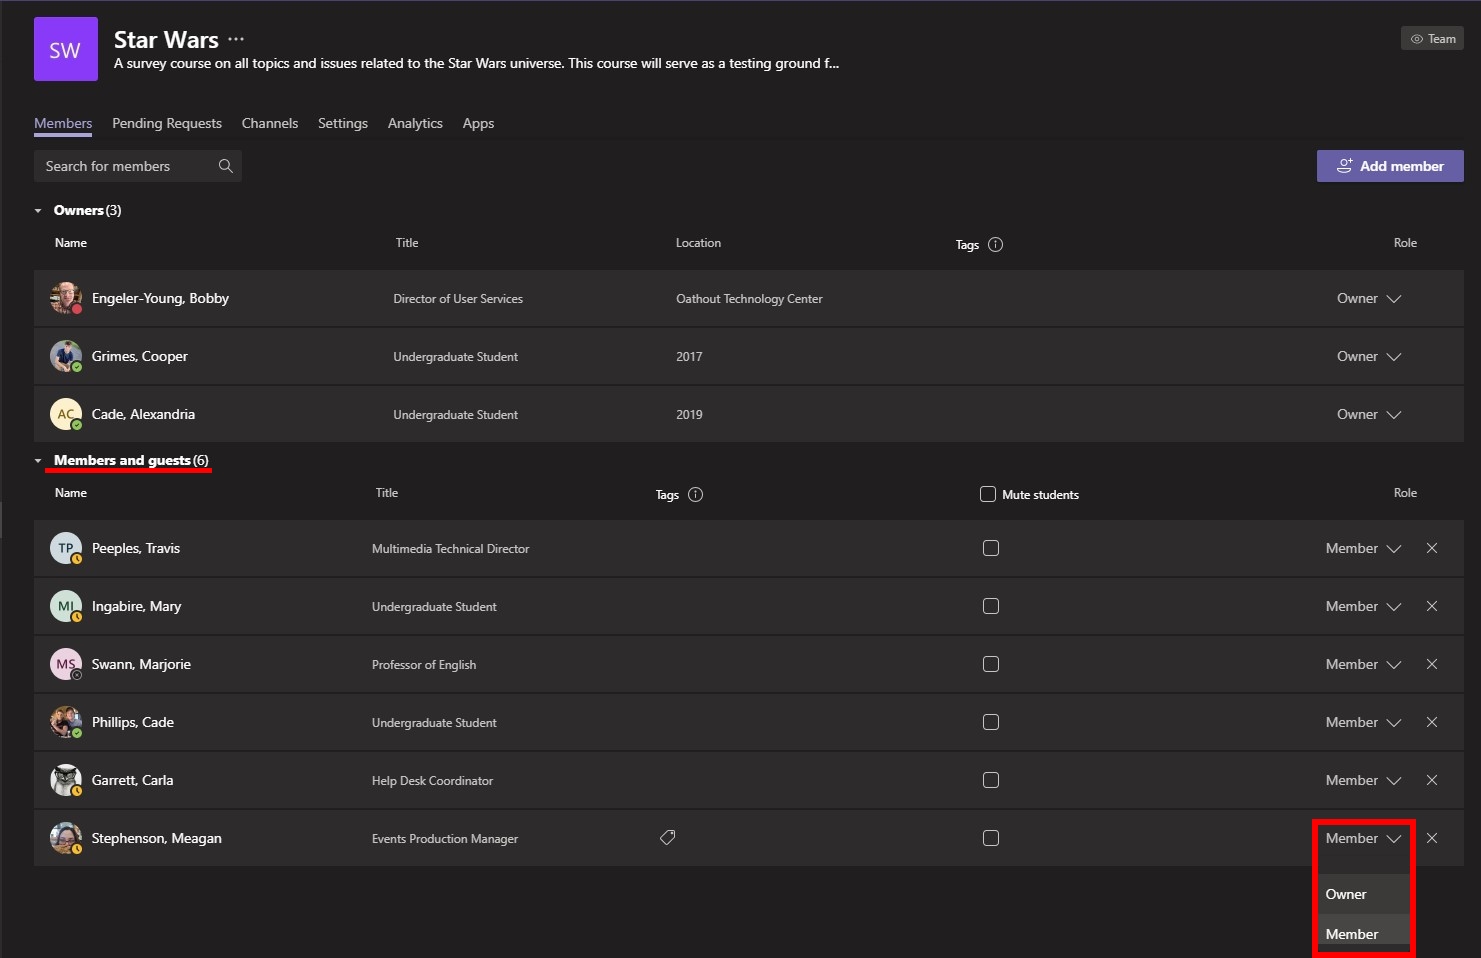
3. This will bring you to the Members tab on the management page. Click Members and guests to reveal the Team's members. Using the drop down in the Role column, you can choose whether a person is a member or an owner in the Team.

4. To remove someone from a Team, click the x at the end of their row.
