Once you have mastered creating quizzes, surveys and forms you may want to add more advanced formatting the following list will walk through more advanced formatting options
Add a picture or logo to a form header- use a picture or image in your form header, such as a logo, as a great way to set the stage for the message you deliver with your form or quiz
Add a picture to a question-use a picture or image with your form and quiz questions as a way for users to understand the context
Add a video to a question-add videos to your form and quiz questions as a way for users to understand the context
Add sections to your survey or questionnaire-Sections help orient your form responders consume a long survey that has been organized into smaller parts.
Adjust your form or quiz settings- Use form and quiz settings to specify deadlines, identify form responders, display correct answers for quizzes, and to set other preferences for Microsoft Forms.
Change a form theme - You created questions for your form, and now you’re thinking about form design: the background design and colors. You want the form to have a bit more visual pop. How do you get that? Use themes!
Change your picture size - Change the size of your pictures in Microsoft Forms by making them larger, smaller, or zooming in to see just one part of the picture. You can also add alternative text to pictures and images into your forms and quizzes for screen readers to narrate.
Copy a form
Format your survey or quiz questions - In Microsoft Forms, you can bold, italicize, or underline words, allowing you to emphasize and differentiate content with hierarchy.
Shorten the URL of your survey
Use branching logic in Microsoft Forms - You can add branching logic to a survey or quiz so that it changes according to the responses to specific questions. In a survey or quiz that branches, questions appear only if they are relevant to the respondent. If the questions don't apply, the respondent is redirected to a different set of questions or will skip a set of questions altogether.
When you add a picture or logo to the form header, the picture displays at the top left corner of the form.
1. In Microsoft Forms, open the form you want to add a picture and then select the form header section.
2. Click insert Image

3.You can choose to search for pictures and images from Bing, your OneDrive folder, or upload a picture from your computer or device.
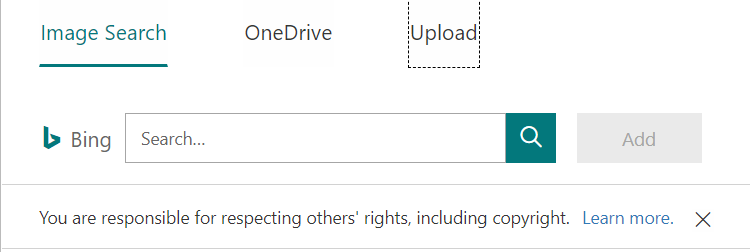
4. If you want to search for pictures and images online, click Image Search, enter a search string, select the picture you want, and then click Add.
When you search for clip art and pictures online, you'll be directed to Bing. You're responsible for respecting copyright, and the license filter in Bing can help you choose which images to use.
5. If you want to add a picture from your OneDrive folder, click OneDrive, find the picture you want to add, then click Add.
6. If you want to add a picture or logo from your computer or device, click Upload, and in the Choose File to Upload box, find the picture or logo you want to add, and click Open.
1. In Microsoft forms open the form you want to edit
2. Select the question you want to include a picture
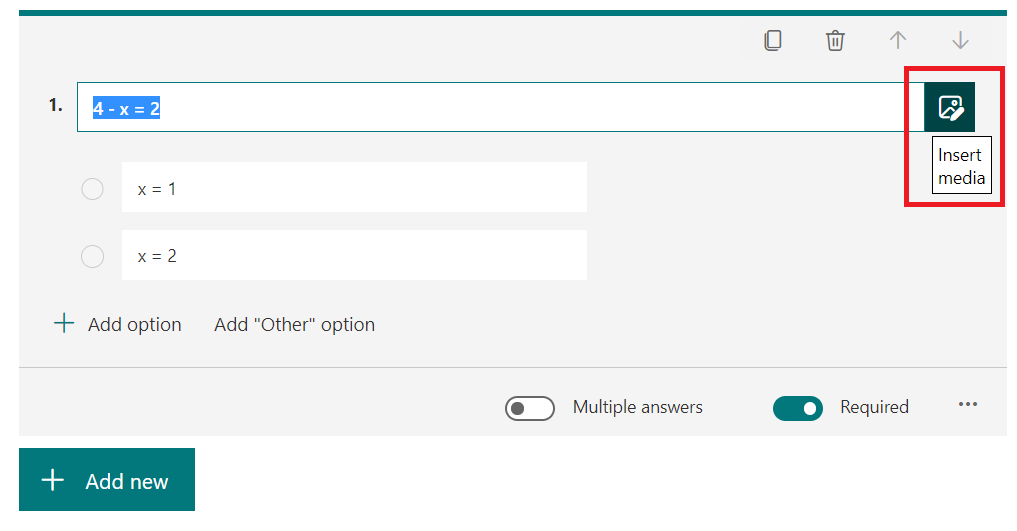
4. The insert media pane appears on the right side of the form. Click Image on this pane.
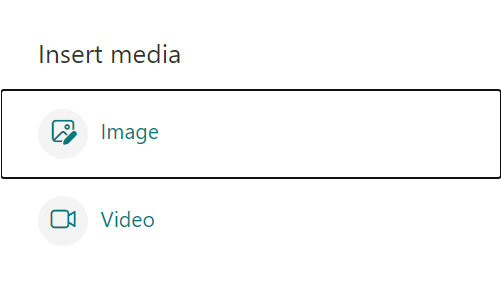
5. You choose to search for pictures and images from Bing, your OneDrive folder or upload a picture from your computer or device.

6.If you want to search for pictures and images online, click Image Search, enter a search string, select the picture you want, and then click Add.
When you search for clip art and pictures online, you'll be directed to Bing. You're responsible for respecting copyright, and the license filter in Bing can help you choose which images to use.
7. If you want to add a picture from your OneDrive folder, click OneDrive, find the picture you want to add, and then click Add.
8. If you want to add a picture from your computer or device, click Upload, and in the Choose File to Upload box, find the picture you want to add, and click Open.
When you preview your form or quiz, you'll see your picture displayed next to the question.
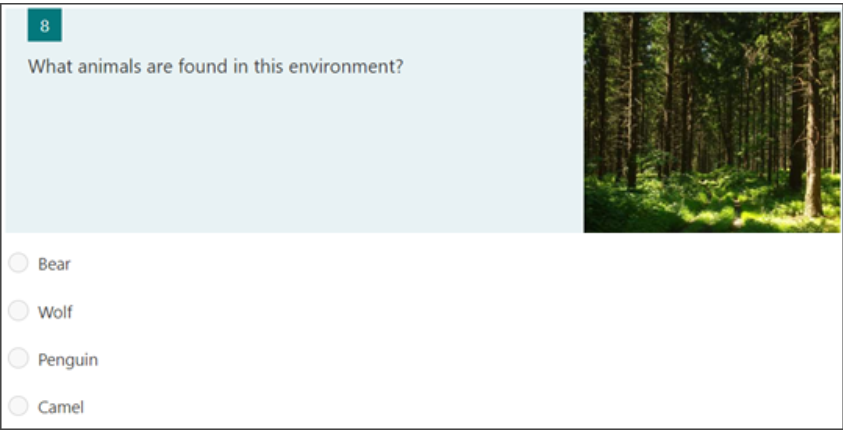
Note: If your picture is set to small, the picture displays on the right side of the question. If your picture is set to large, the picture displays under the question.
In Microsoft Forms, open the form you want to edit.
Select the question you want to add a video.
Click Insert Media  on the right side of the question.
The Insert media pane appears on the right side of the form. Click Video on this pane.
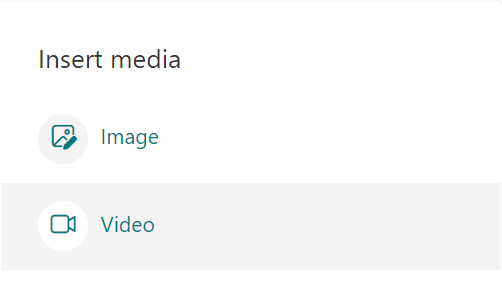
You can only add videos hosted on Microsoft Stream or YouTube to form and quiz questions. Enter the URL for the Microsoft Stream or YouTube video you want to use and then click Add.
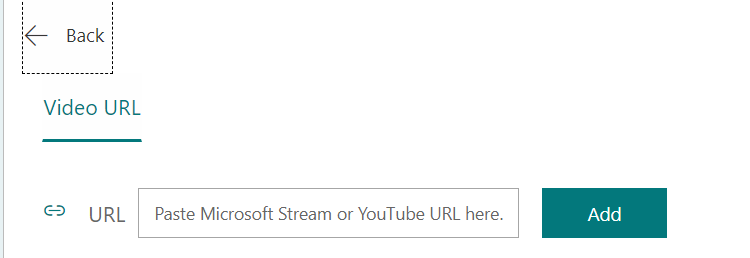
Note: You'll see an error message if you try to use a video that isn't hosted on Microsoft Stream or YouTube
6. When you preview your form or quiz or view your form in design mode, you'll see the video beneath the question.
Open the survey or questionnaire for which you want to add sections.
Select + Add new.
- Select More question types (chevron symbol)

4. Select Section
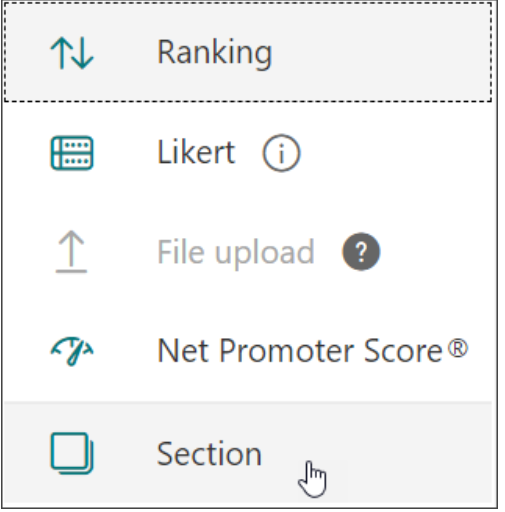
5. Add a section title and description to provide more context for the questions in this section.
Note: The shuffle question feature is disabled when you include sections in your form
Organize the Sections
1. In the section your want to duplicate, remove, or move, click More settings for section  in the upper right corner of the section.
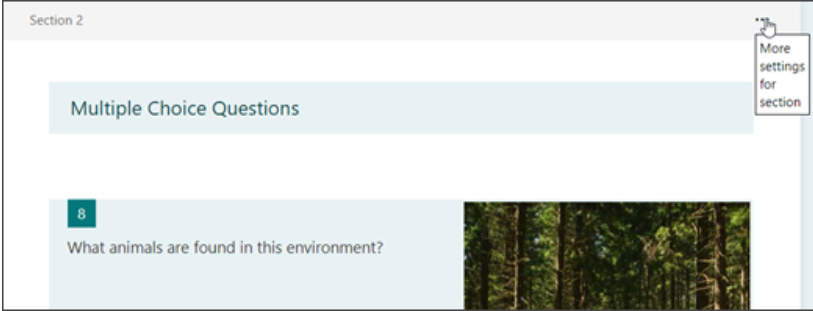
2. Select one of the following:
- Duplicate section- Make a copy of the questions within that section
- Remove section - Select Just section to remove the section header, or select Section and questions to remove the section and all questions within it.
- Move Section- Use the Move up and Move down arrows to rearrange the order of your sections.
- Add branching - Branch your section so that responders only see questions that are relevant to them. If the questions don't apply, the responder will be redirected to a different set of questions or skip a set of questions altogether.
To get to form or quiz settings, select More form settings  , and then select Settings.
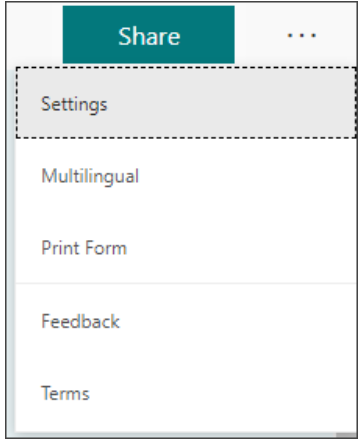
Settings options for forms and quizzes
In the Settings pane, you can select or clear options.
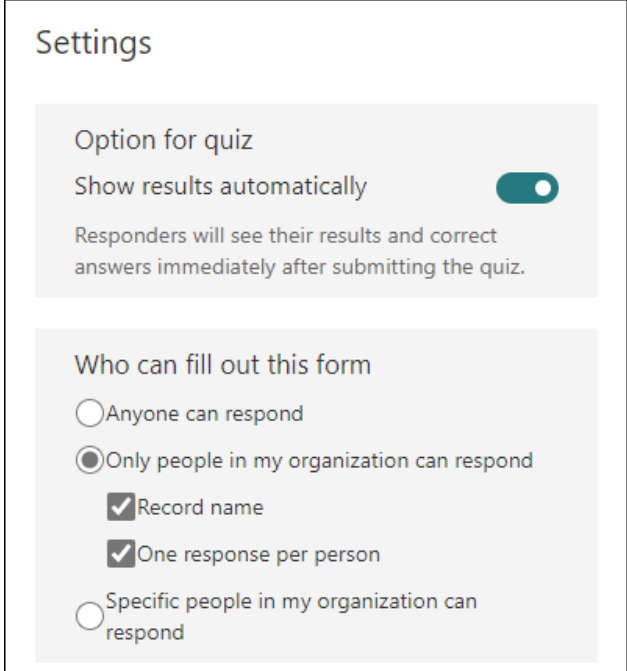
Note: Option for quiz setting is only available for quizzes
Anyone can respond - Anyone inside or outside of your organization can submit responses to your form or quiz.
Only people in my organization can respond - Only people that belong to your organization will be able to respond to your form or quiz.
Record name - Keep track of people that have responded to your form or quiz.
One response per person - Limit form or quiz responses to only one per person. This will prevent individuals from filling out a form or quiz multiple times.
Specific people in my organization can respond - Only people or groups in your organization that you specify can respond to your form.
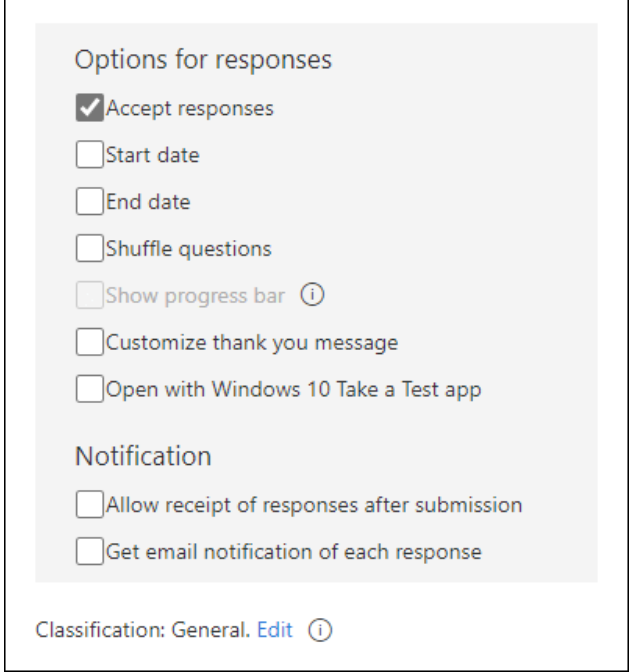
Options for responses
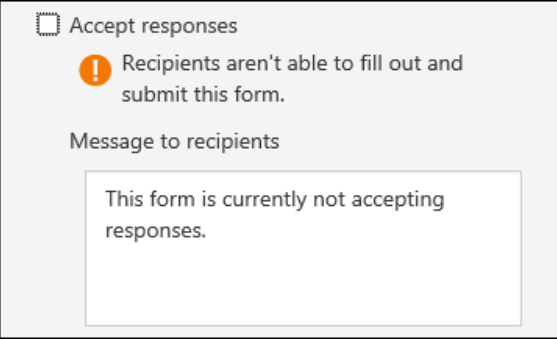
- Accept responses-If this setting is unchecked, you turn off the ability to collect any additional form responses. You can also customize the default message that recipients see when trying to submit their response after you turn off this setting.
- Start date and End date - You can specify an exact date and time when you want to start and stop collecting form responses. Click Start date, then click the date text box and select a date from the calendar control. Select a specific hour from the drop-down list of hour increments. Do the same for End date
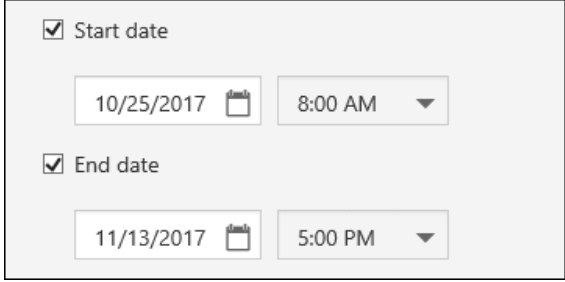
Note: You can't select a time in the past
- Shuffle questions - When this is unchecked (default setting), questions are displayed to respondents in the same order you created them. When this option is checked, the order of questions displayed will be randomly shuffled. Each respondent sees the questions in a different sequence.
- All questions - Shuffle the order of all questions in the form or quiz.
Lock questions - Shuffle the order of all questions except for those you designate (e.g. questions 3-5).
Note: If your form or quiz has multiple sections or pages you will not be able to shuffle questions
- Show progress bar - Responds will see a visual indicator of their progress while completing a form or quiz.
Note: The progress bar is only available on forms and quizzes that contain multiple sections or pages. Customize thank you message - Display a thank you note upon completion of your form or quiz. Click in the text box to create a customized messages
In Microsoft Forms, open the form for which you want to change the theme.
Click Theme at the top right of the design window and pick the color or background you wan
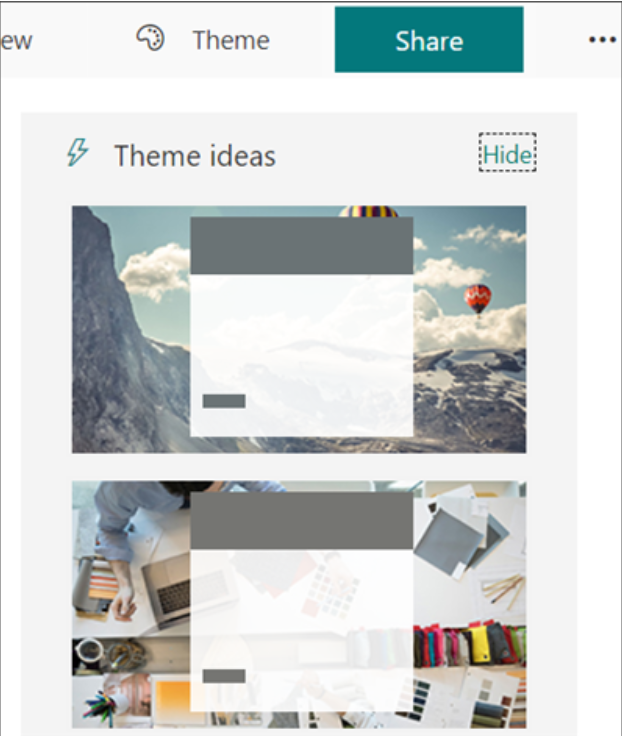
3. If you prefer another background image, such as one stored on your computer, click the Customize theme button  , then click the Upload image icon
  , and then select one of the following
- Image Search - Enter your search text in the Bing search box, and then click the Search button to see your search results. Pick the background image you want, and then click Add.
- OneDrive - Click the OneDrive folder that contains your image. Select the image, and then click Add.
- Upload - Navigate to the folder that contains your image. Select the image you want, and then click Open.
If you want to replace the image you selected with a different one, click the trash can icon the current image and then click the Upload image icon  to start the process over.
In Microsoft Forms, open the form you want to edit.
Select the picture you want to edit next to a specific question. You can alternate between large and small settings when working with pictures next to questions.
Click Edit  to view the picture editing options.
By default the picture displays in a small size. If you want the picture to be bigger, click Large  .
.
If you want the picture to be smaller, click Small  .
.
Zoom in or out on a picture
You can zoom in to magnify a picture or zoom out to see more of the picture. You can do this for pictures displayed in the form header section as well as pictures displayed next to questions.
Click Edit  to view the picture editing options.
If you want to zoom in on a specific area of the picture, click Zoom In  to adjust the picture and then use your mouse to center it where you want.
If you want to zoom out, click Zoom Out  to adjust the picture and then use your mouse to center it where you want.
Add Alternative text
Select the picture you want to edit.
Click Edit to view the picture editing options.
Click Alternative text for screen readers and then type in the text you want to have screen readers narrate when focus is in on the picture
1. Go to forms.office.com and sign in with your Microsoft 365 work or school account or Microsoft personal account (Hotmail, Live, or Outlook.com).
2.Scroll down to the bottom of your page and select All My Forms

3.On the form you want to copy, select  More options in the upper right corner of its tile, and then choose Copy.
Tip: if you don't see form tiles, you might be in List view instead of Tiles view. To copy a form with List view, hove to the right of the form, select More options> Copy
4. You'll see a duplicate form at the top of your list under All My Forms. It will have the same name as your original form.
When you copy a form, only the questions, format, and layout are copied. No existing responses are carried over to the new form. Microsoft Forms gives the new form the same name as the existing form, which you can change to what you want.
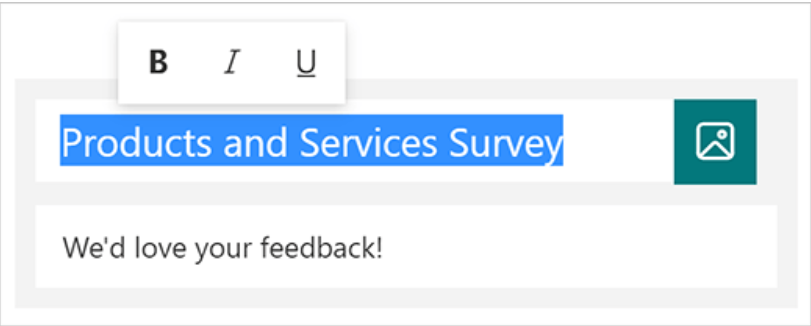
In Microsoft Forms, open the form or quiz for which you want to format your text.
Highlight a word or words in your title or questions, and then choose bold, italics, or underline from the floating toolbar.
In Microsoft Forms, open the form or quiz for which you want to create a short URL.
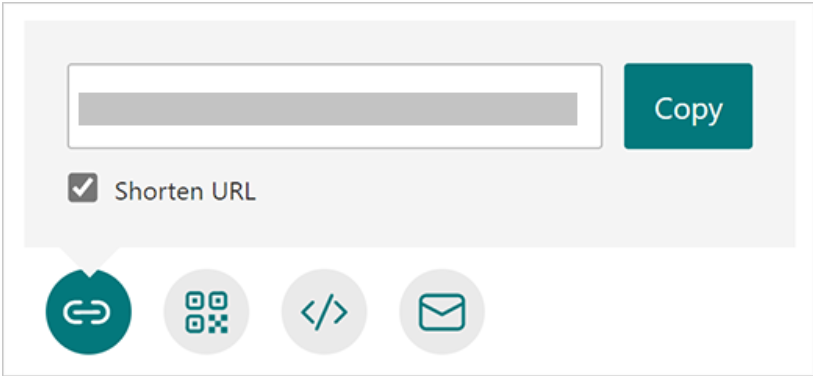
- In the Share pane under Send and collect responses, select the drop-down list and choose from whom you want to collect responses
- Select the Shorten URL option if you want a shorter URL than what's provided.
Before you get started, it's a good idea to make sure all of your questions are created. When you're ready to add branching, follow these steps:
1. Go to the question for which you want to add branching. Select More settings for question  , and then choose Add branching.
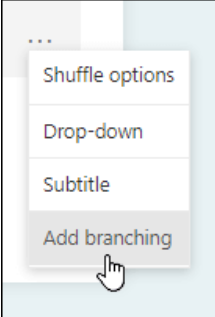
Note: If you add sections to your form, you can also add branching to a section. On the section you want to branch, select More settings for section  , and then choose Add branching.
2. On the Branching options page select the drop-down list next to the question you want to branch.
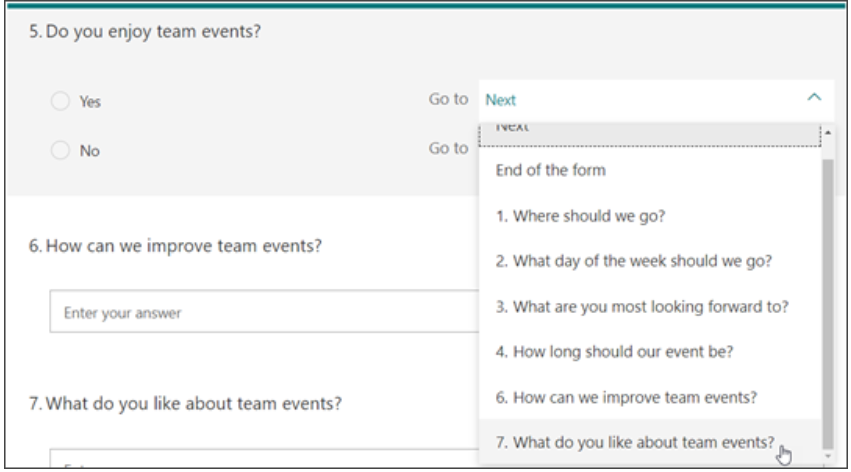
3. Select the question that you want to branch to. In this example, if a respondent answers Yes to question #5, you would direct them to go on to the next question (#6). However, if the respondent answers No to the question #5, you would have them branch, or skip, to question #7.
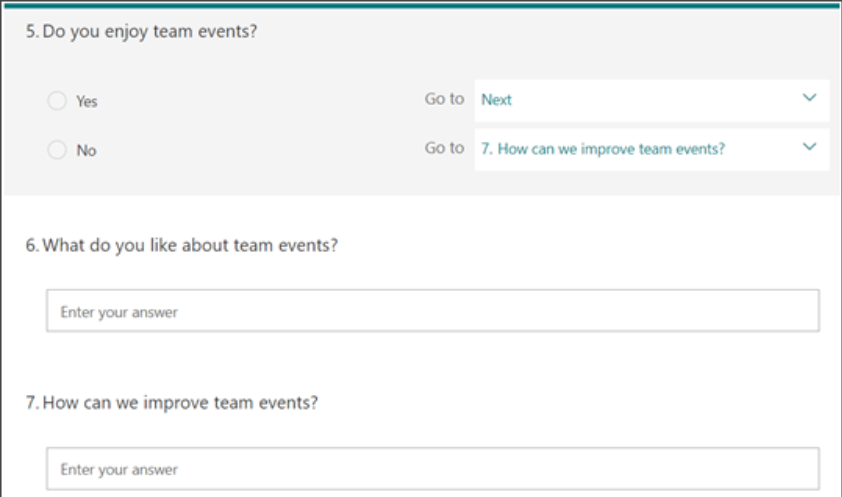
Notes:
- You can only branch to a consecutive question and not a preceding one. For example, if you have seven questions in your form and want to add branching to question 4, it can only branch to questions 5, 6, 7, or end of form. In the same example, question 5 can only branch to questions 6, 7, or end of form.
- If you try to branch to a preceding question, such as question 4 branching to question 2, it will break the experience for your respondent by skipping questions 5 through 7 and taking them directly to the end of the form with the Submit button. To prevent this, only branch to a consecutive question.
4. To insert additional branches to your survey or quiz, repeat steps 2 and 3. If you want a particular question assigned as the final one in the survey or quiz, select the drop-down list next to that question, and then select End of the form.
If you want to completely reset your form and remove branching, select More options  , and then choose Reset.